Your Preferences
You can access the Preferences options through the button that looks like a gear in the bottom-right corner of any Bible page.
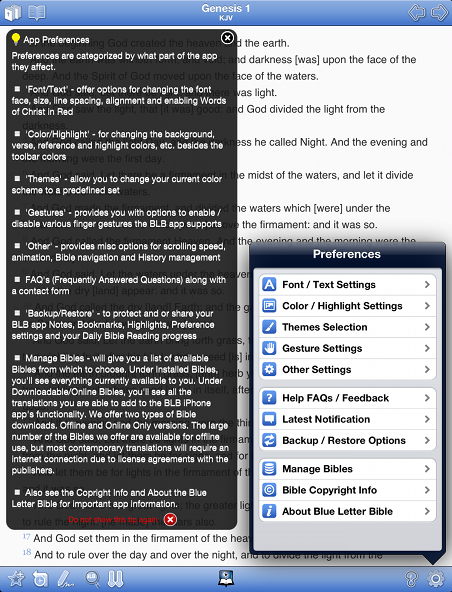
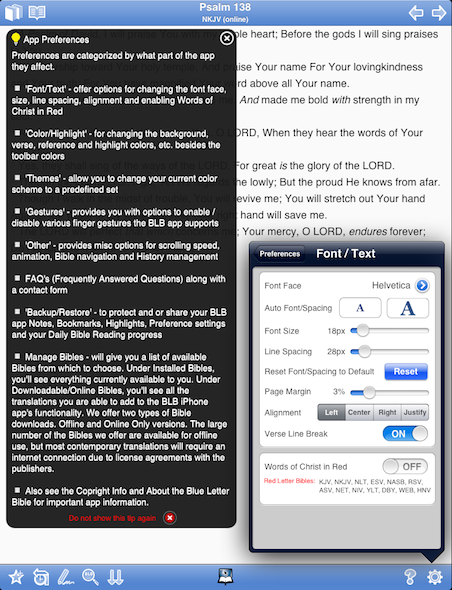
The first section of the Preferences menu focuses on formatting the look and feel of the BLB app. This is where you can change the font and its size. You can alter the space between lines and how the verses are aligned within your window.
Next we have color options. This lets you change the color of your text and verse references. Further, we have some more robust options for your highlights. Along with being able to change the color of a particular highlighter, you can change the name to reflect what you want to have that particular color represent (e.g. messianic profecy, miracles, etc.).
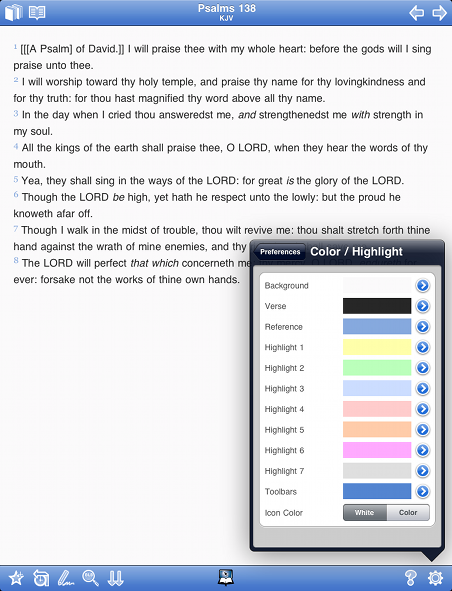
At the bottom of the colors section of the menu, we give you the option to switch to color icons from our default white.
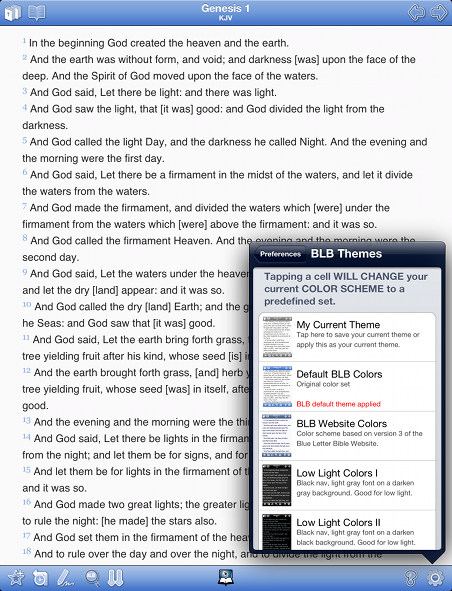
Next we have Themes where you can quickly change your current color scheme represented by a core set of app preferences (toolbar, background and font colors) by simply selecting a predefined set.
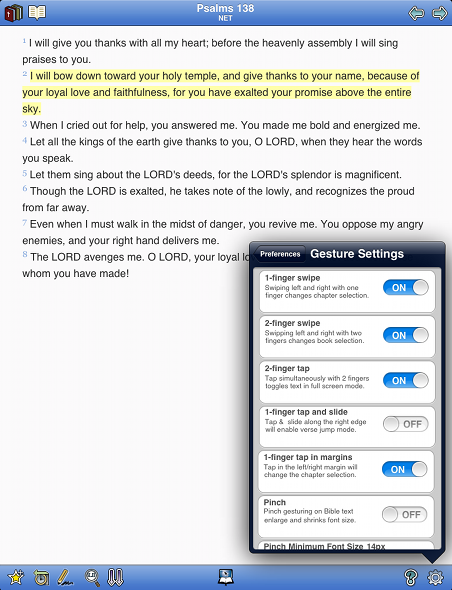
Next you'll find a number of finger gesture settings. You may also disable anyone of these gesture features by switching them off.
» 1-finger swipe: Swiping left and right with one finger allows you to change the chapter selection.
» 2-finger swipe: Swiping left and right with two fingers allows you to change the book selection.
» 2-finger tap: Tapping simultaneously with two fingers toggles the Bible text to full screen mode.
» 1-finger tap and slide: Tap and slide along the right edge will enable verse jump mode.
» 1-finger tap in margins: Tap in the left/right margins will change the chapter selection.
» Pinch: Pinch gesturing on Bible text englarge and shrinks the font size.
» Pinch Minmum Font Size: Slide to adjust the minimum font size when using the pinch gesturing. This option permits you to set the minimum font size that the text can reduce to when you pinch to reduce the Bible text.
Below that are some miscellaneous options, such as animating the prior/next chapter transfer and the ability to mangae which Bibles you'll be using.
Addionally you will find the Autoscroll speed option, which affects the speed at which the Autoscroll feature will scroll through a chapter.
6. Backup / Restore Options
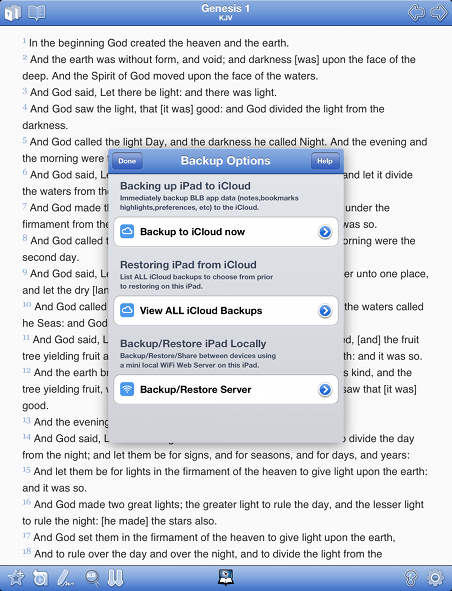
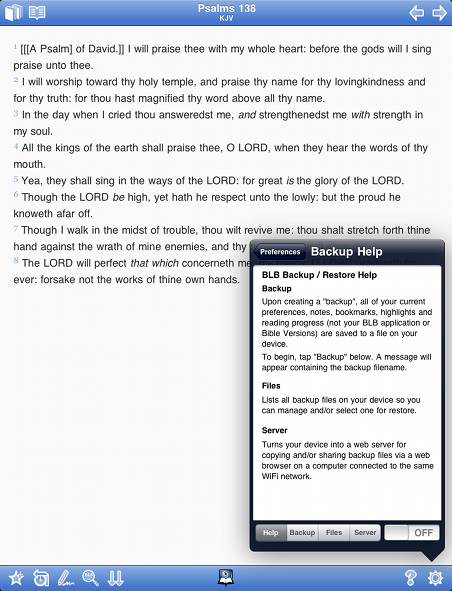
With the integration of the iCloud, you are now have two options for backing up and restoring your BLB app data. Either Backup/Restore to/from iCloud or locally using a built-in WiFi web server
» Help: Provides general instructions for how to Backup and Restore your BLB app data to and from the iCloud along with information about the Backup/Restore Server option.
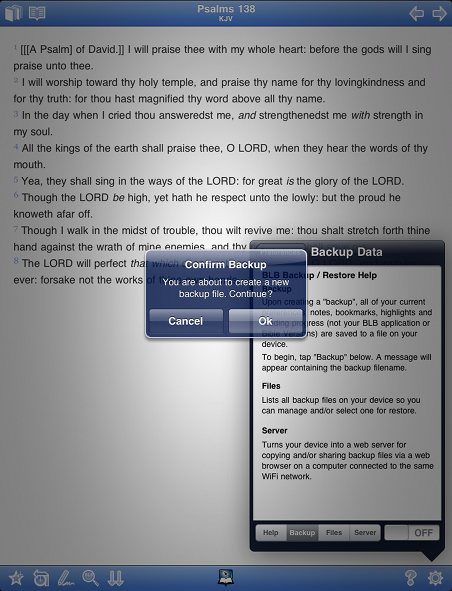
» Backup To iCloud: Provides for backing up your BLB app data to the iCloud with just a tap. This option when tapped prompts you to immediately create a backup of all your current BLB Bookmarks, Highlights, Notes, Preference settings and Daily Bible Reading progress. When the backup is complete you will be prompted with the results.
It is important to note that backing up to the iCloud will also store the backup file stored locally on your device so that you can restore at a later time using the 'Backup/Restore Server' feature.
» View ALL iCloud Backups: This option when tapped will list all of your current backup files residing on the iCloud. It is from here that you can then perform a restore to a particular backup file with restore options.
» Backup/Restore Server: This feature allows you to manage Backing up and Restoring of BLB app data locally via a web server features over a local WiFi network.
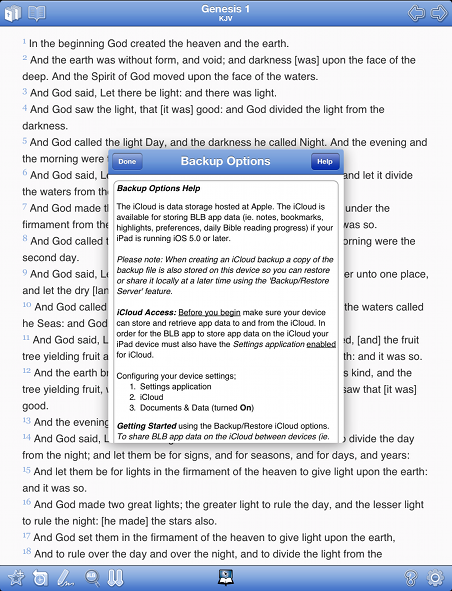
Backup Options Help information is displayed when tapping on the "Help" button in the upper right hand corner. Tapping the "Help" button a second time will toggle off the help information.
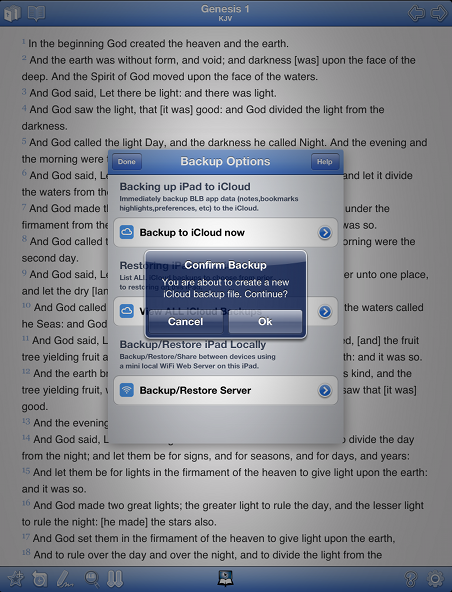
When tapping on the "Backup to iCloud now" you will be prompted to immediately create a backup of all your current BLB Bookmarks, Highlights, Notes, Preference settings and Daily Bible Reading progress.
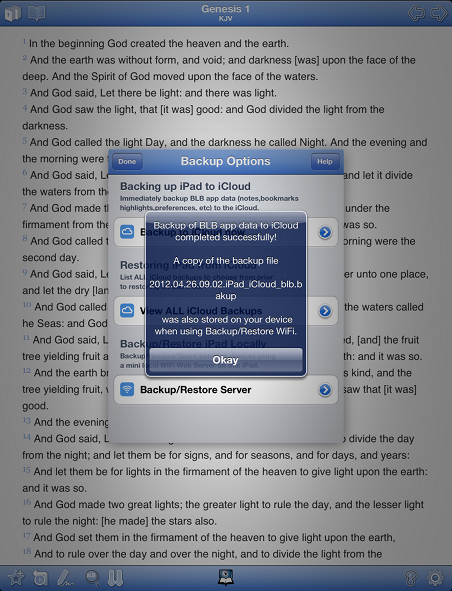
Results of the backup to the iCloud.
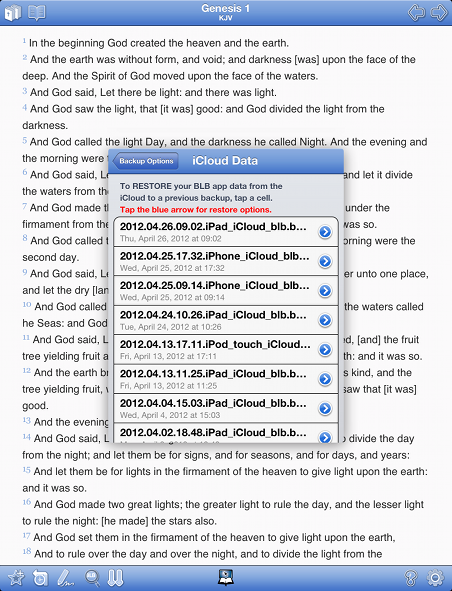
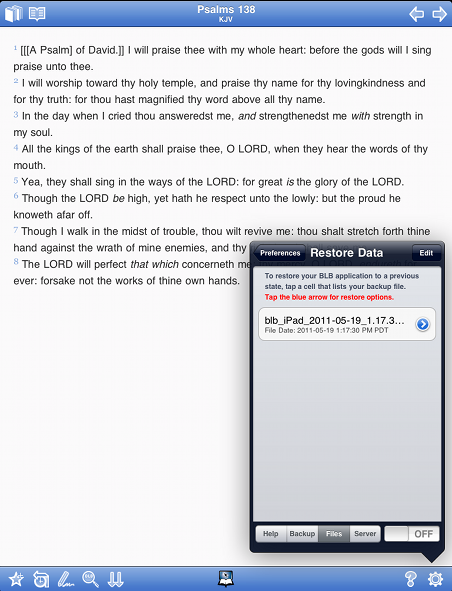
When tapping on the "View ALL iCloud Backups" the BLB app will list all of your current backup files residing on the iCloud. It is from here that you can then perform a restore to a particular backup file with restore options.

Tapping on a blue arrow next to one of the restore files will display a menu of what you want restored and or merged of your BLB app data. This is especially important if you are performing a restore from another device and want to selectivly choose what is restored.
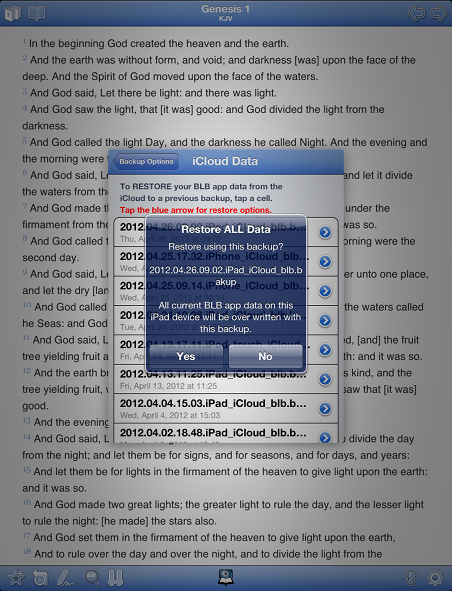
Prompt for performing the restore from the iCloud. Do not forget to take advantage of using the "Restore Options" by tapping on the blue button. This will offer you the advantage as to what you want to restore or not and will affect your data.
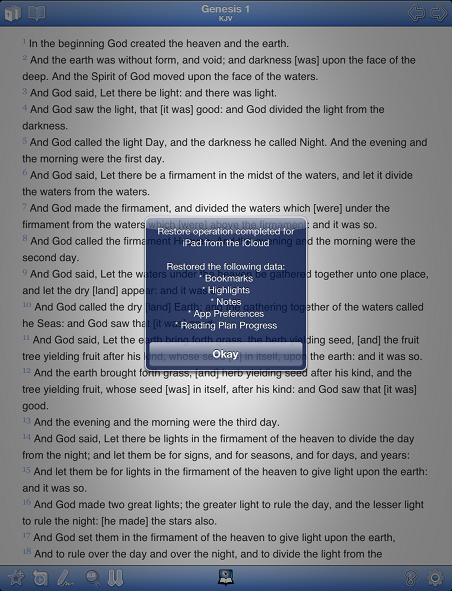
Results of the restore from the iCloud.

Managing your BLB app data backed up to the iCloud is accomplished from your device Settings application. This Settings application is found on your device home screen. Tapping on the Settings will display your Apple device settings options. It is from here that you would tap on the iCloud settings option.
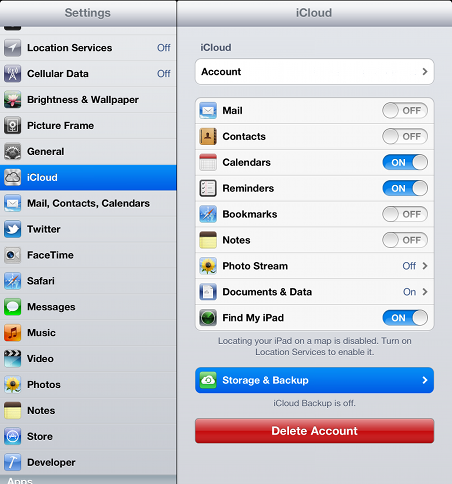
Next you would tap on the Storage & Backup settings iCloud option.
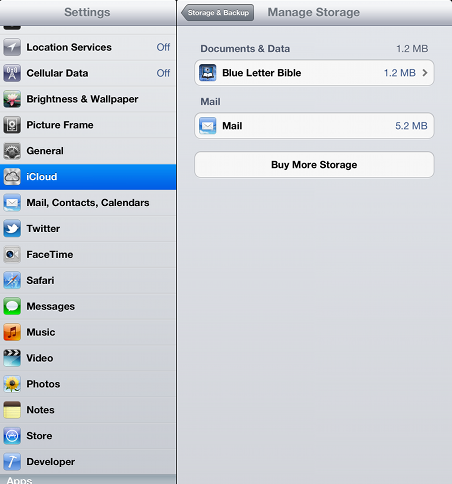
From the Manage Storage iCloud settings option you will see the Blue Letter Bible Data. Tapping on it will display a list of all iCloud Backup data stored on the iCloud.
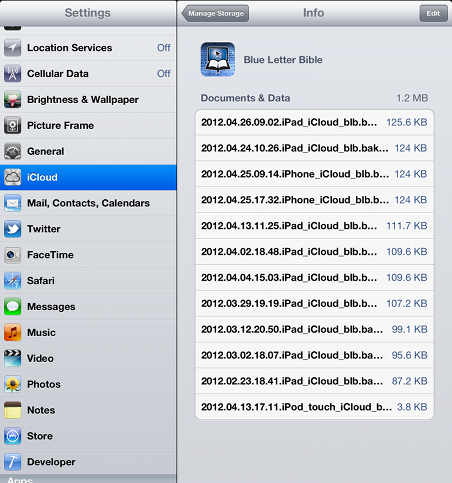
Finally you will see a list of all of your iCloud BLB backed up data.
It is important to note that if you own multiple Apple devices using the same shared iTunes account and of which are running the BLB app that you can backup from one device and restore to others.
To delete old backup files residing on the iCloud, tap on the "Edit" button located in the upper right hand corner. From here you can then delete individual or all of your iCloud BLB app data.
Backup / Restore using WiFi Server
Here you'll find a number of options for backing up and restoring your BLB app data.
» Help: Provides general instructions for how to Backup and Restore your BLB app data.
» Backup: This option when tapped prompts you to immediately create a backup of all your current BLB Bookmarks, Highlights, Notes, Preference settings and Daily Bible Reading progress.
» Files: This option when tapped will list all of your current backup files residing on your device. It is from here that you can then perform a restore to a particular backup file with restore options.
» Server: This turns your device into a web server for copying and or sharing your backup files via a web browser on a computer connected to the same WiFi network. Copying backup files to an external computer will ensure your BLB backup data is kept safe off of your device and can be used later to share with another device.
Backup / Restore
Tapping the "Backup" button prompts you to create a backup of all your current BLB data (ie. Bookmarks, Highlights, Notes, Preference settings and Daily Bible Reading progress).
Tapping the "Files" button lists all of your current backup files residing on your device. To perform a restore operation select and tap one of the backups listed.
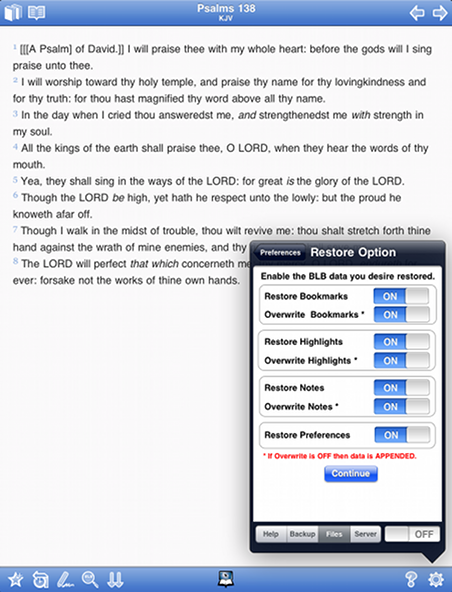
Tapping the blue arrow displayed in the restore files will display a list available restore options to choose from.
Sharing / Transferring Backups
To share your backup files with another device you must first transfer them to a desktop computer. You can share a backup file from a previous backup on your device with friends devices running the BLB app using these same steps.
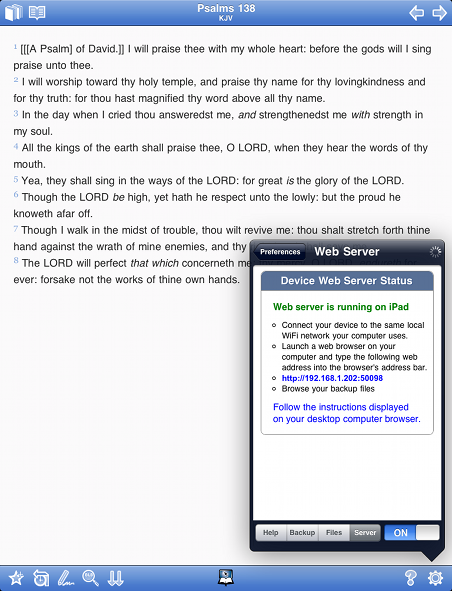
To transfer backup files to and from your device you must start the "Server" by fliping the switch to ON. This turns your device into a web server for copying and or sharing your backup files via a web browser on a computer connected to the same WiFi network as your device.
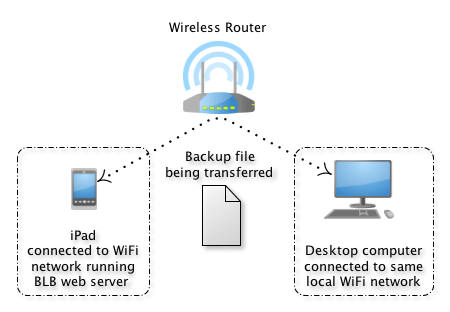
Once the server is ON now launch a web browser on your computer connected to the same WiFi network as your device and type the web address shown on the BLB app web server.
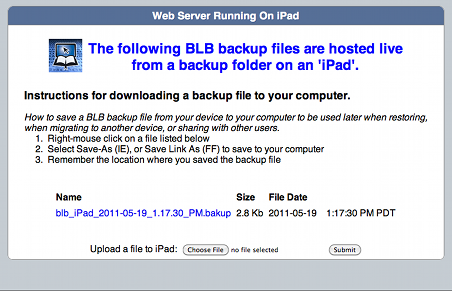
You should now be viewing files which are residing on your device through a web browser on your computer connected to the same WiFi network.
Follow the instructions as displayed in the web browser to transfer files either from your computer (upload) to your device or to your computer (download) from your device.